@Mafanga Lee
2nd February 2025 - 07:21:14
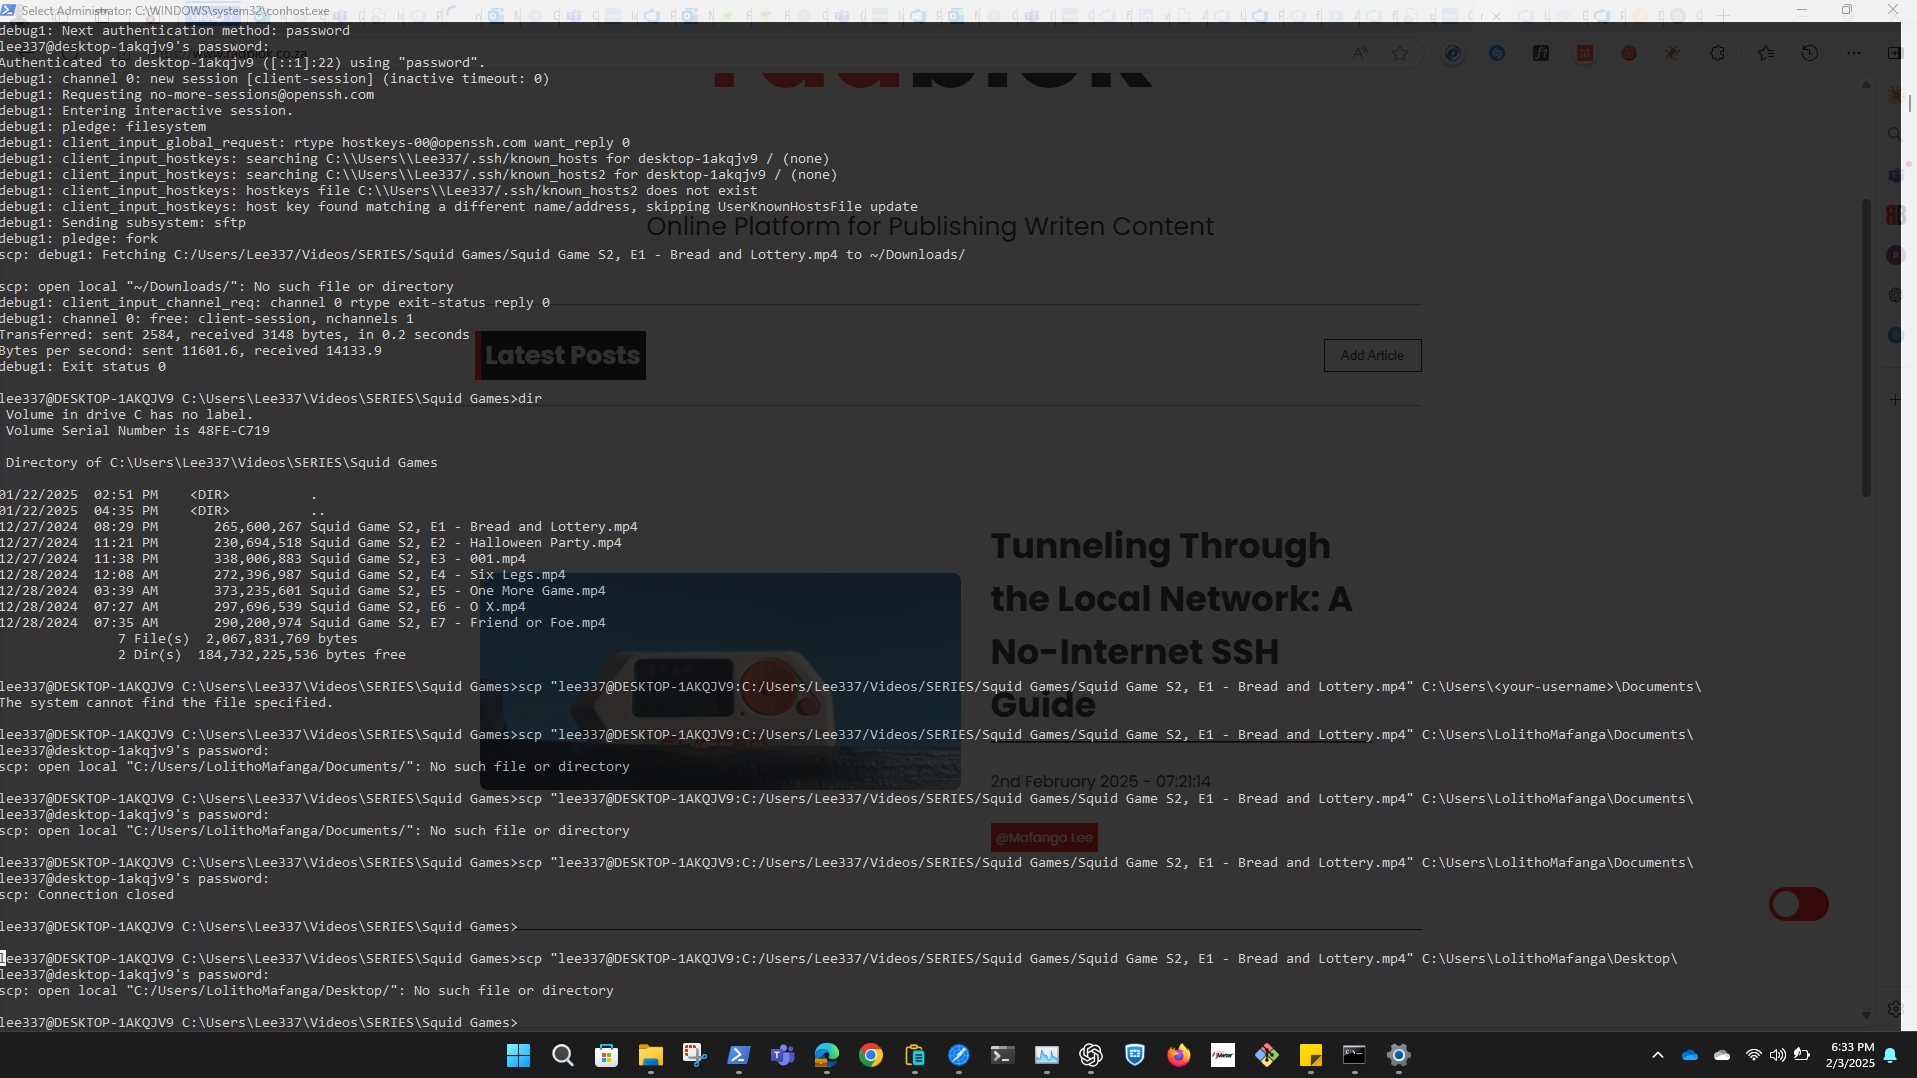
Scenario: Local Network File Sharing and SSH Access
1. Connecting Windows 1 and Windows 2
- Ensure both machines are connected to the same Wi-Fi or Ethernet network (even without internet).
- Assign static IPs or use DHCP reservation for consistency in accessing Windows 2.
- Check connectivity using
ping <Windows_2_IP> from Windows 1.
2. Accessing Files from Windows 2
- Enable file sharing on Windows 2:
- Go to Control Panel > Network and Sharing Center.
- Click Advanced sharing settings.
- Enable File and Printer Sharing and Network Discovery.
- Share a specific folder:
- Right-click a folder > Properties > Sharing tab > Advanced Sharing > Check Share this folder.
- Access from Windows 1 via
\\<Windows_2_IP>\<SharedFolder> in File Explorer.
3. Setting Up SSH on Windows 2
- Install and enable the OpenSSH Server on Windows 2:
Add-WindowsFeature -Name OpenSSH-Server
Start-Service sshd
Set-Service -Name sshd -StartupType Automatic
- Allow SSH through Windows Firewall:
netsh advfirewall firewall add rule name="OpenSSH" dir=in action=allow protocol=TCP localport=22
- Find Windows 2's local IP (
ipconfig in Command Prompt). - From Windows 1 (WSL), SSH into Windows 2:
ssh username@<Windows_2_IP>
4. Ensuring Connectivity Without Internet
- If Windows 2 is not connected to the internet but is on the same local network, it can still communicate with Windows 1.
- If no router is involved, you can create an ad-hoc network or use a crossover Ethernet cable between them.
- Set manual IP addresses (e.g.,
192.168.1.10 for